
November 28, 2020
Memento Mori (Part 1: Carving)
I have a few pieces of jewelry wax that I've been hanging onto for awhile now and haven't touched. Recently, I've become inspired by those old-timey memento mori jewelry pieces, so I wanted to bust out the wax and try some lost wax casting for myself. Memento Mori, in case you don't know, is Latin for "remember you must die". Memento mori jewelry was popular in the late 16th and 17th century and was meant to remind the wearer of their own mortality. During my research into the topic, I saw several pendants of skeletons enclosed in coffins and decided to sketch out my own version.
What I used:
-- Beeswax and soft jewelry wax
-- Tea candles & aluminum foil (for melting the wax)
-- Poster board (to create mold boxes)
-- Pocket knife and craft knife (for carving)
-- Assortment of metal- and rubber-tipped sculpting tools (for detail work and smoothing the wax)
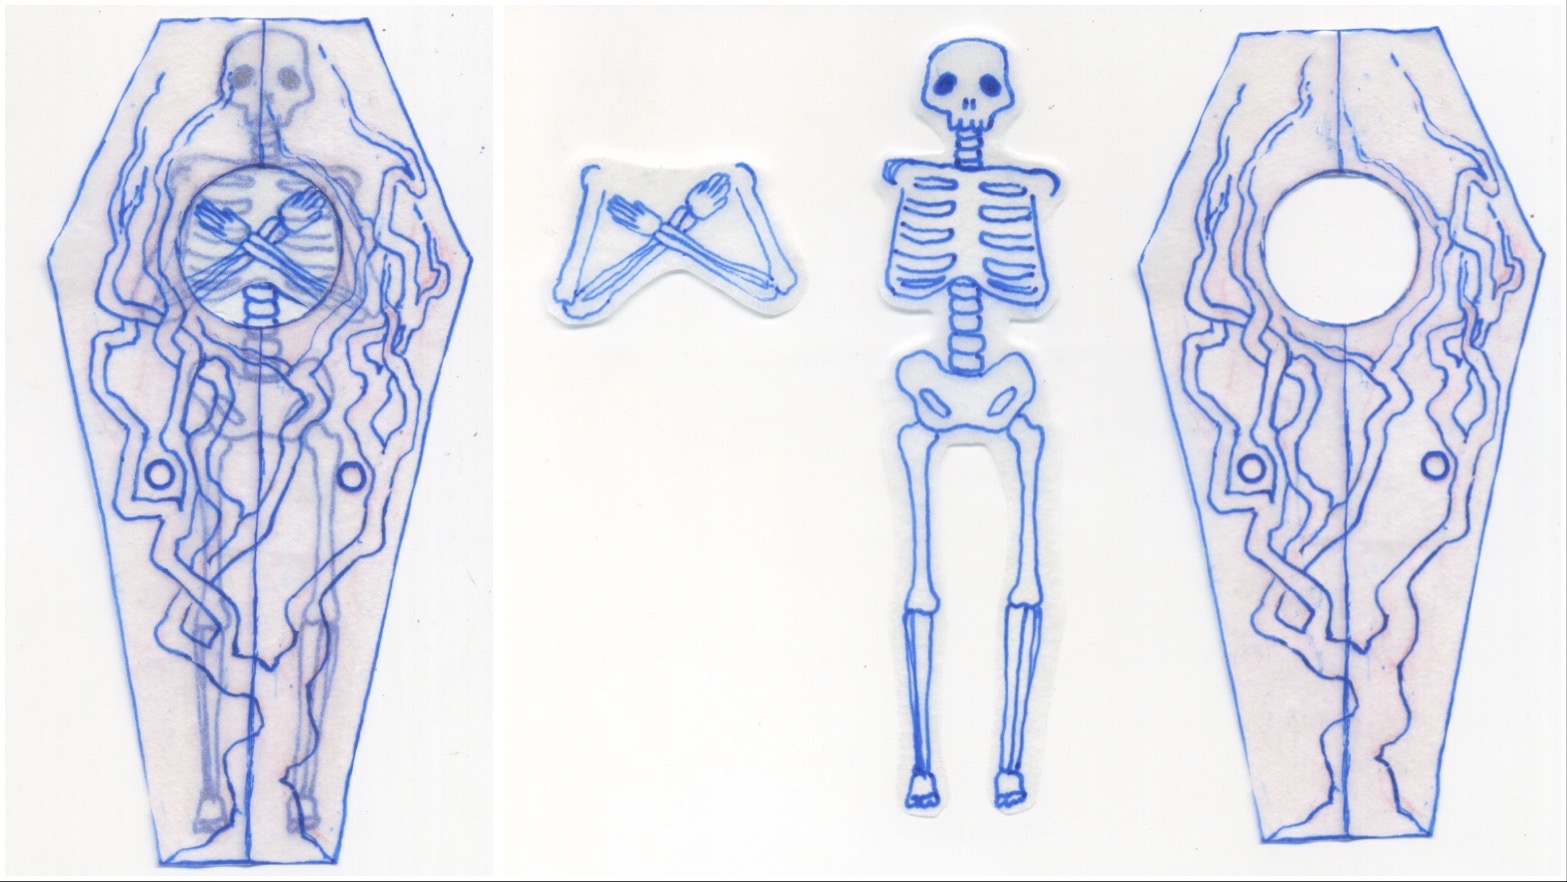
My design includes a coffin with a two-piece door, a round window, a tree design, and of course a skeleton to rest inside. The skeleton I stylized a bit for simplicity. I drew out the final design on a sheet of tracing paper so that I could stack the pieces on top of each other and make sure that everything was the right size. Afterwards I scanned in the drawings because the design was a bit too big and I wanted to be able to print it out at whatever size I wanted.

Now, about wax. I was originally going to use the hard jewelry wax that I mentioned, but when I started carving it, I had some difficulties. I've never carved jewelry wax before and am not familiar with the methodology, so it just kinda crumbled and broke when I tried working with it. I really should've done some research before hand, so yeah, that's on me. I also a fair amount of beeswax pellets on hand from when I needed to string up a marionette, so I decided to try that instead. I placed one or two tea candles in a bowl and laid crude, aluminum foil molds over the top. I filled the molds with beeswax and waited for the candles to melt the wax into blocks approximately the size of the pieces I'd be carving. Right away, beeswax was so much easier to work with. While it was still warm, I carved off the excess material and the blade went through the wax like a hard cheese. When the wax had cooled comepletely, I got out a craft knife and carved the finer details. However, this is where beeswax failed me a bit. I noticed that the more I worked with the wax, the more fragile and crumbly it became (this is probably why people use jewelry wax instead!). By the time I finished the entire skeleton, it kept breaking at the neck, waist, and knees.
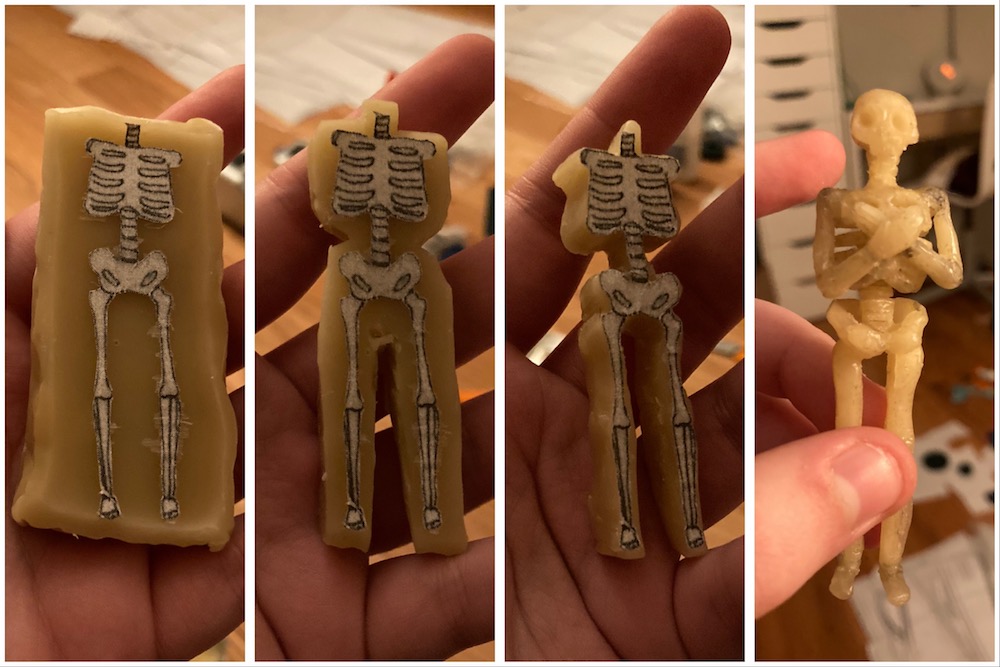
I was, however, able to carve the entire thing. I cut out a slightly smaller, printed out copy of the skeleton design and stuck it onto one of the wax blocks in order to make the body. After I had carved along the paper's edge, I peeled the design off and carved the rest, using an image of a skeleton's side profile as a reference. When I finished, I repeated that process for the skull and arms, which I attached once I had finished carving everything.
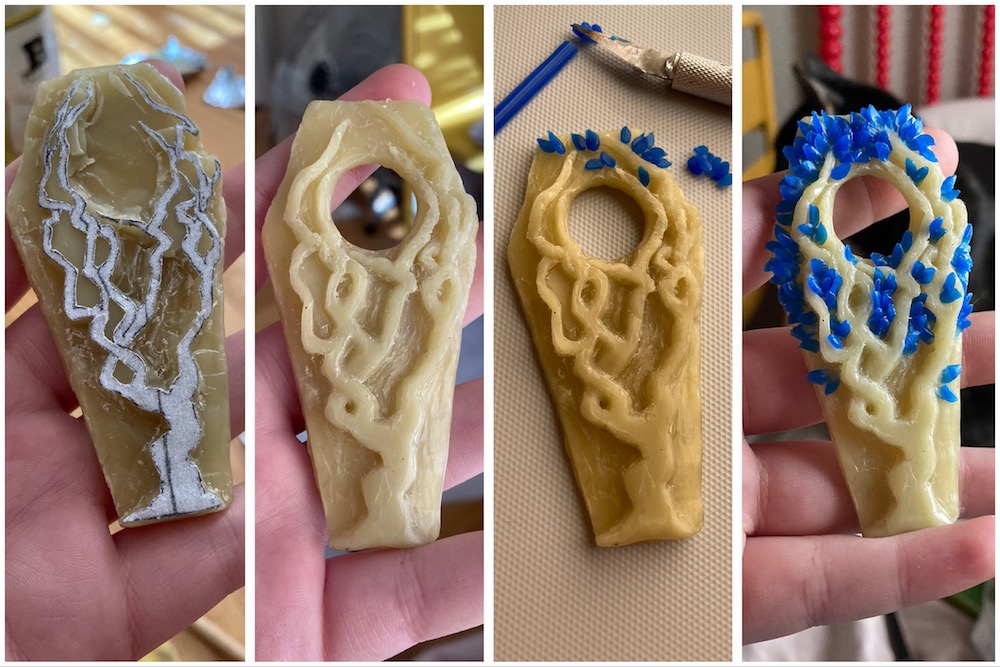
For the coffin pieces, I used my original design to contruct mold boxes out of poster board. This gave me flat sheets of wax in precisely the right shapes for the coffin (I accidentally poured the liquid wax too thick though and had to shave it down). I used hot wax to assemble the coffin and again used my original design to carve the tree on the coffin lid. The leaves were made from a half-cylinder of soft jewelry wax that I cut into slivers and smoothed onto the coffin lid using sculpting tools. I will say that the beeswax worked well for the coffin lid because there weren't any fine, fiddly details like the skeleton had. This meant that the beeswax never became all crumbly from overwork, which was nice.
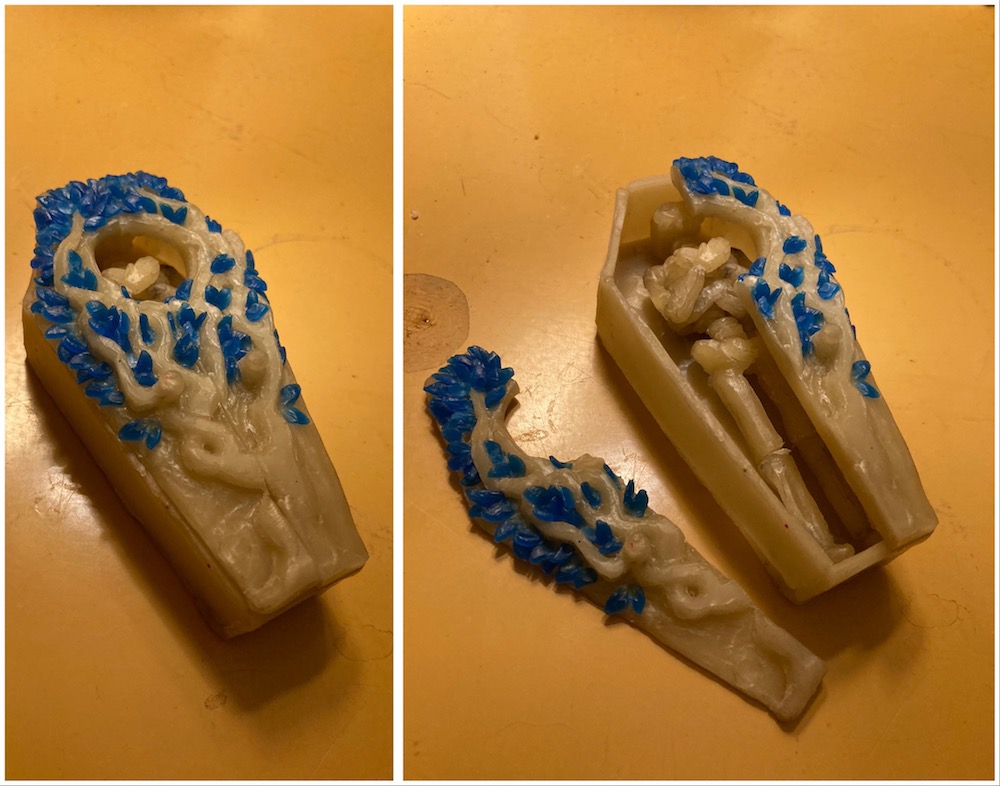
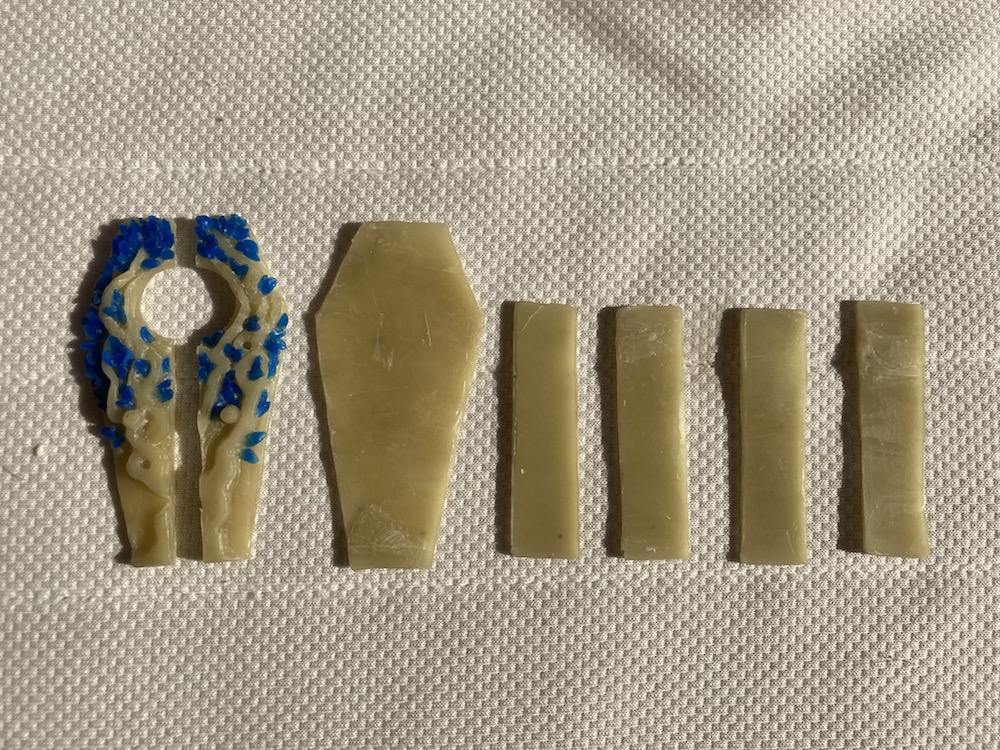
This is the finished product! I cut the coffin lid in half down the center and added knobs to either side of the doors. The plan is to create hinges that will allow the two doors to swing out. Originally, I meant for this piece to be a pendant that could be worn around the neck. Unfortunately, the finished carving ended up significantly larger than I had planned, meaning that the metal version will most likely be too bulky and heavy to be worn as a necklace. I might have to resign it to being a decorative art piece instead, but I'm still proud of how well the sculpture turned out. The next step will be the lost-wax casting which I've never attempted before. Should be fun! See you then.