
November 27, 2020
Sewing a Corset
I'm very much tired of looking in vain for bras that fit and are comfortable. I've decided instead to try sewing an everyday corset, meaning that I can make it to my own exact measurements and therefore have something that's guaranteed to fit. I've heard all sorts of horror stories about corsets, but I'm not planning on having any waist compression so I think that it'll be safe. I'm also hoping it'll help with my posture since I have an infamously bad slouching habit.
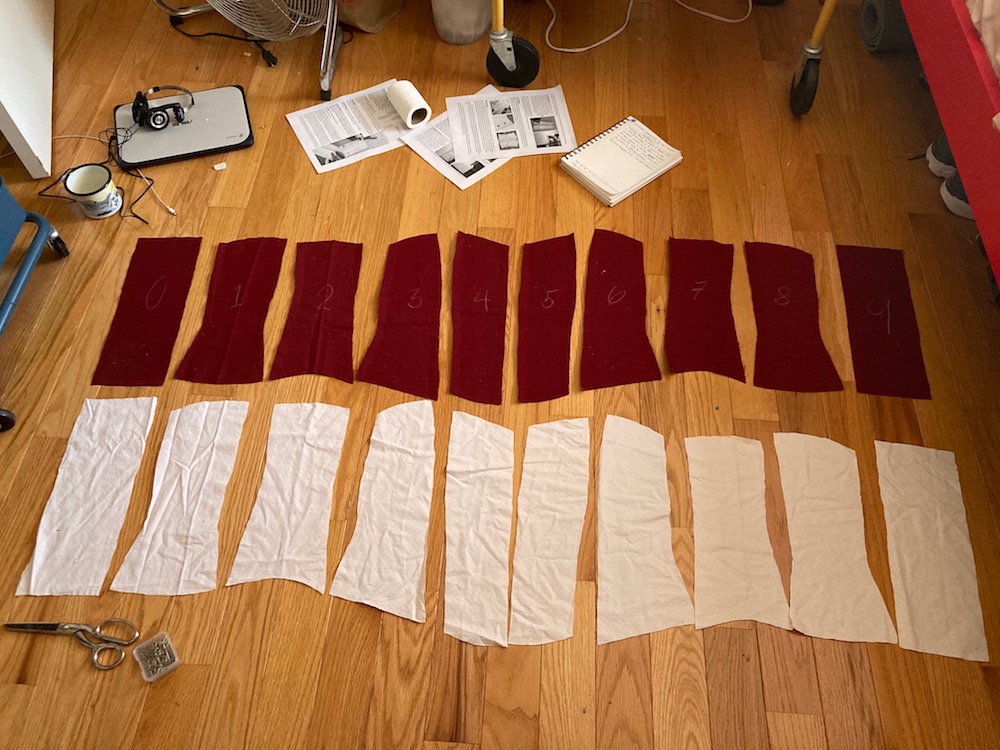
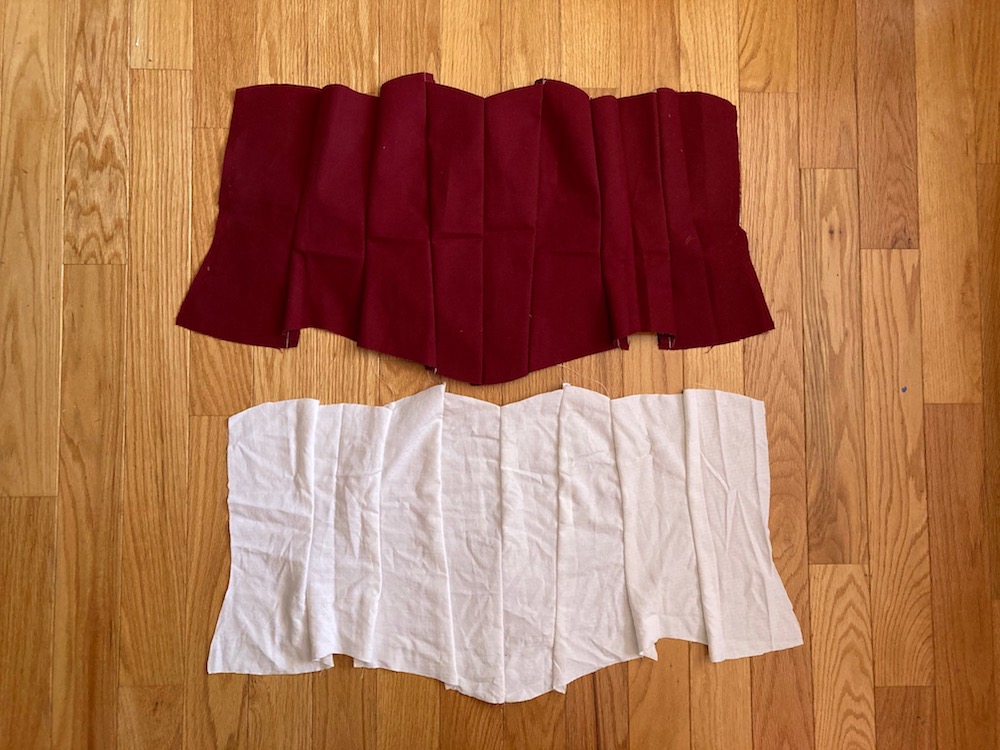
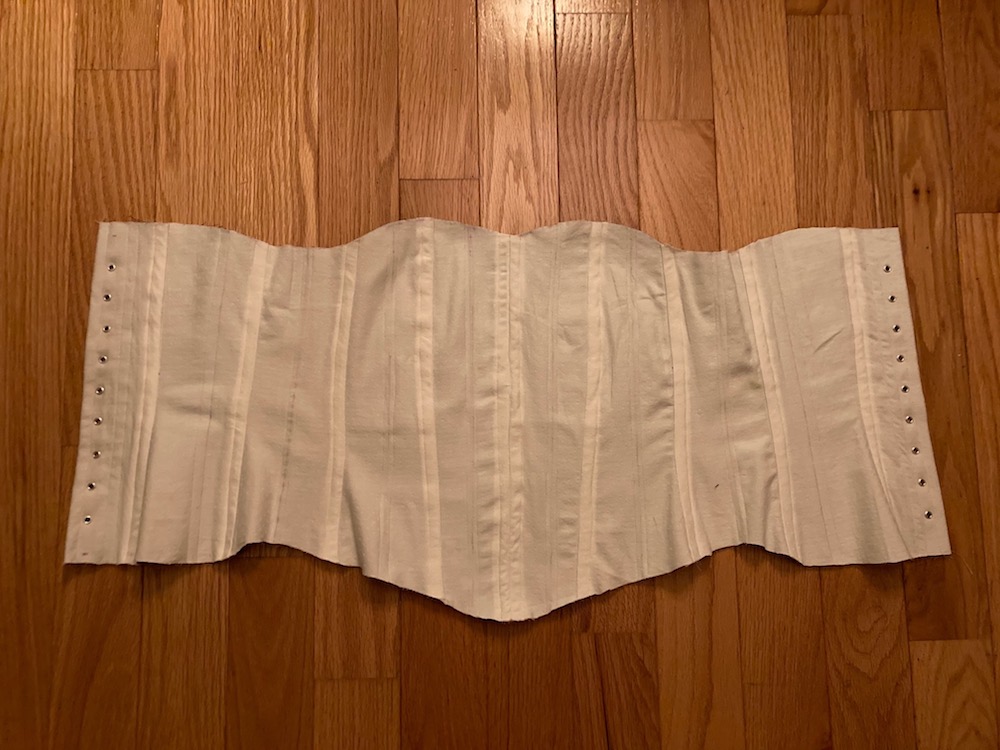
I used the Rethreaded victorian corset pattern for this project, but I bought one size bigger since they factor in waist compression which I am not interested in. I'm making a two-layered corset, so I used two different fabric types: a sturdy red canvas-type fabric and a lightweight white fabric I cut from old repurposed sheets. Now, the pattern and just about every corset-sewing tutorial I've looked at recommends making a mock-up corset first to ensure it fits, but I only had enough of the canvas-type fabric for one corset and I didn't feel like driving to the fabric store to look for more. Instead, since I knew that the pattern was bigger than I needed, I cut out the canvas panels and pinned them together along the 3/8-inch seam allowance. That way I was able to take in the top and bottom edge of the corset until it fit when I "tried it on". When I got it pinned the way I liked it, I trimmed off the excess fabric and used the new panels to cut out the pieces from the lightweight fabric. Then I sewed the panels together and ended up with the inner and outer corset layers. *Side note -- the original corset pattern includes a front opening busk which I exlcuded for simplicity. I only really started sewing this summer and have never sewn anything as complicated as this, so I cut corners at times to make it easier on myself. The pattern also includes instructions for waist tape that I ommitted in my version.
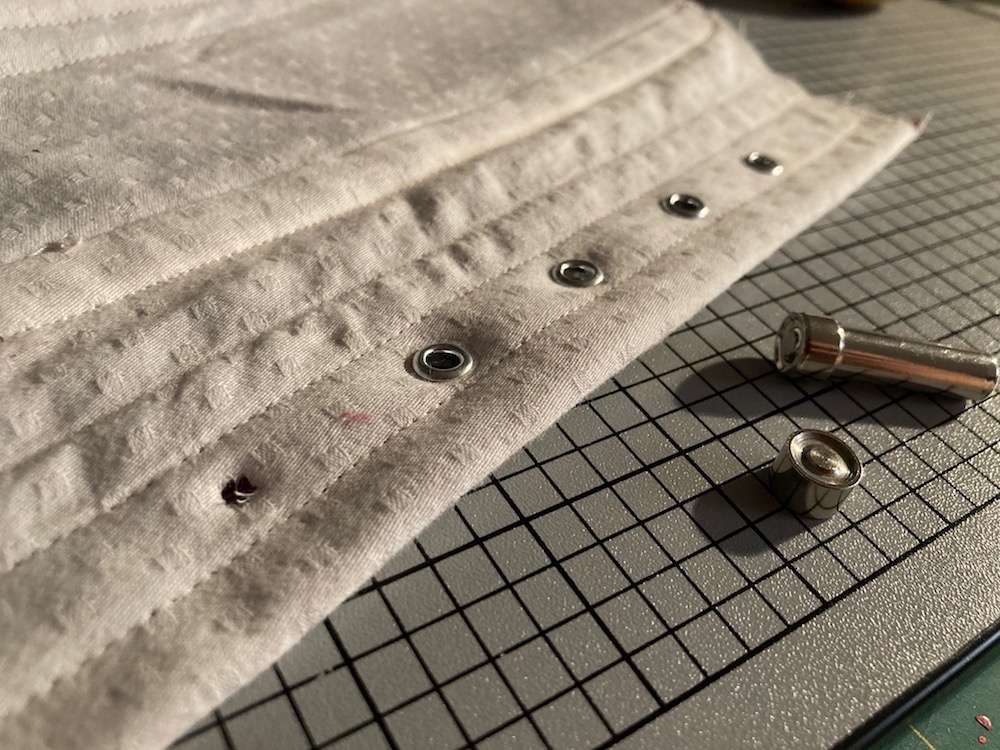
At this point I needed to sew the two halves together, which I did by sewing the boning channels through the two layers of fabric. I sewed a boning chanel over each of the panel seams, as well as one in the middle of each panel. When I got to the lacing panels in back, I folded the red layer in half on top of itself and wrapped the white fabric around to the inside. I then folded the edge of the white fabric in to create a hem and sewed through the two layers of fabric. Afterwards I sewed two boning channels per lacing panel. The next step was the eyelets. I used an awl to poke holes in the fabric and purchased a small eyelet kit at the fabric store that I used to attach the eyelets.
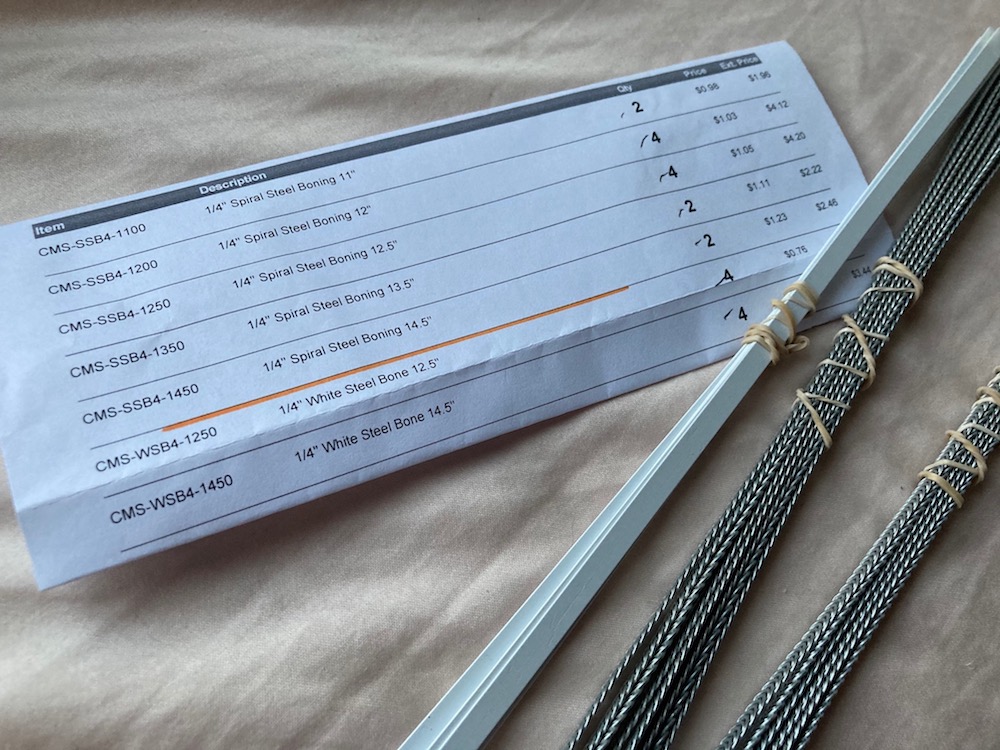
With the two halves sewn and the eyelets done, all that was left was to add the boning and finish the edges. Before I started with the boning, however, I trimmed the top and bottom edges of the corset into flattering curves. I then measured each boning channel and subtracted 1/2 inch from each measurement in order to get the length needed for each corset bones. I ordered a mix of flat and spiral steel boning from Corset Making Supplies. I used eight flat bones (4 for the lacing panels in back and four for the frontmost channels) and spiral steel for the rest. Once I slid the bones in, the corset had a lot more structure to it.
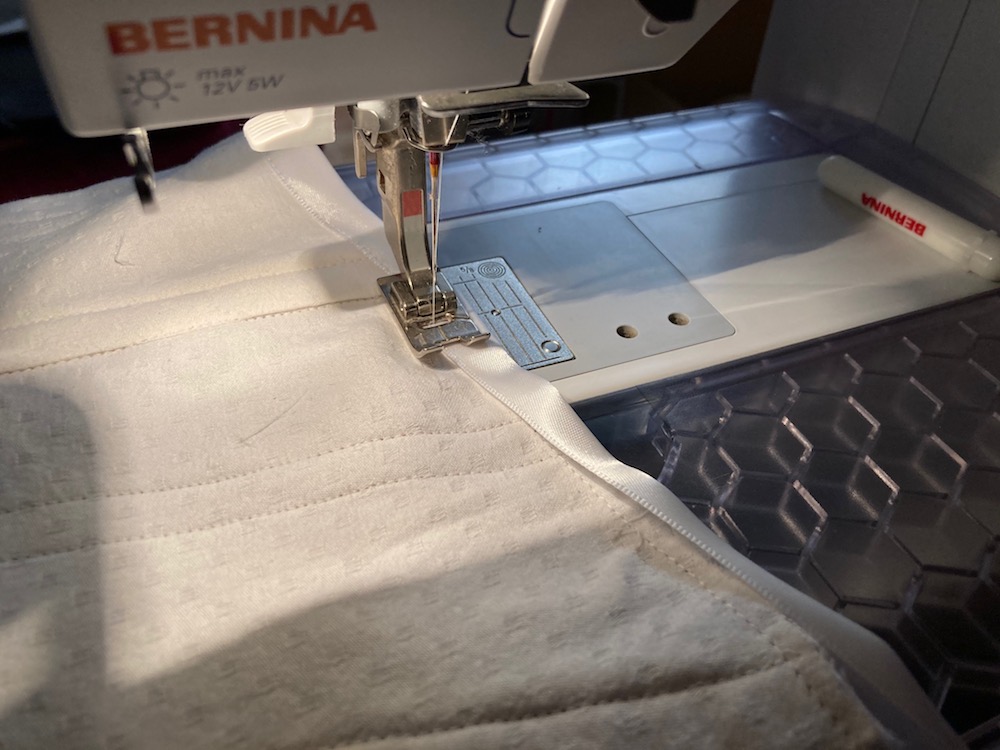
The final step was to bind the edges of the corset. I bought binding tape specifically for this step, but I accidentally bought tape that was too wide and instead went with a white, 7/8-inch ribbon that I was using to lace up the corset. In retrospect I actually prefer the ribbon because it matches with the lacing in back and has a nice sheen that contrasts with the matte white fabric I used for the outer layer. Anyway, I sewed the ribbon onto the inside of the corset and then folded it over the edge and sewed it down along the outside of the corset. For some of the channels, the half inch of room I left myself wasn't enough, and I found myself having to sew closely along the edge of the corset in order to avoid sewing over the bones. Word of Warning! Go slow during this step because I was sewing too quickly and accidentally sewed directly over one of the steel bones. The sewing needle shattered and a piece of it would've caught my eye if I hadn't turned away quick enough. So don't be an idiot like me and wear safety goggles or at least sew slowly and carefully!
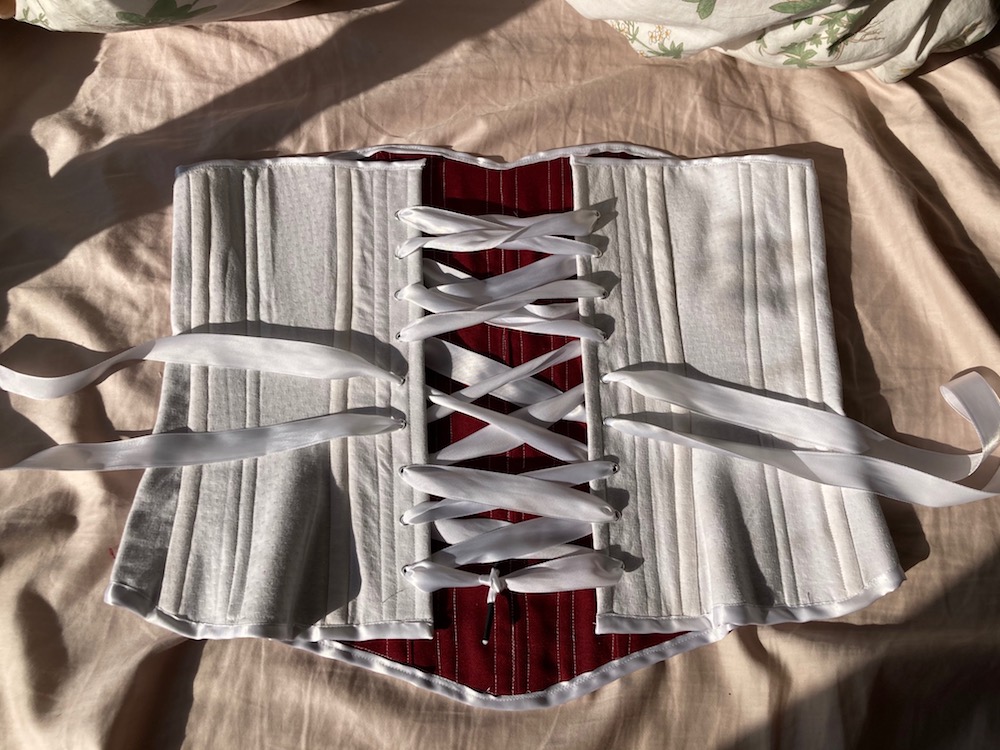
This is the final product. I laced it up using the inverted bunny ears method with the aforementioned ribbon. The sewing is little sloppy in areas due to the fact that I'm just starting out at sewing, but overall it turned out surprisingly well.
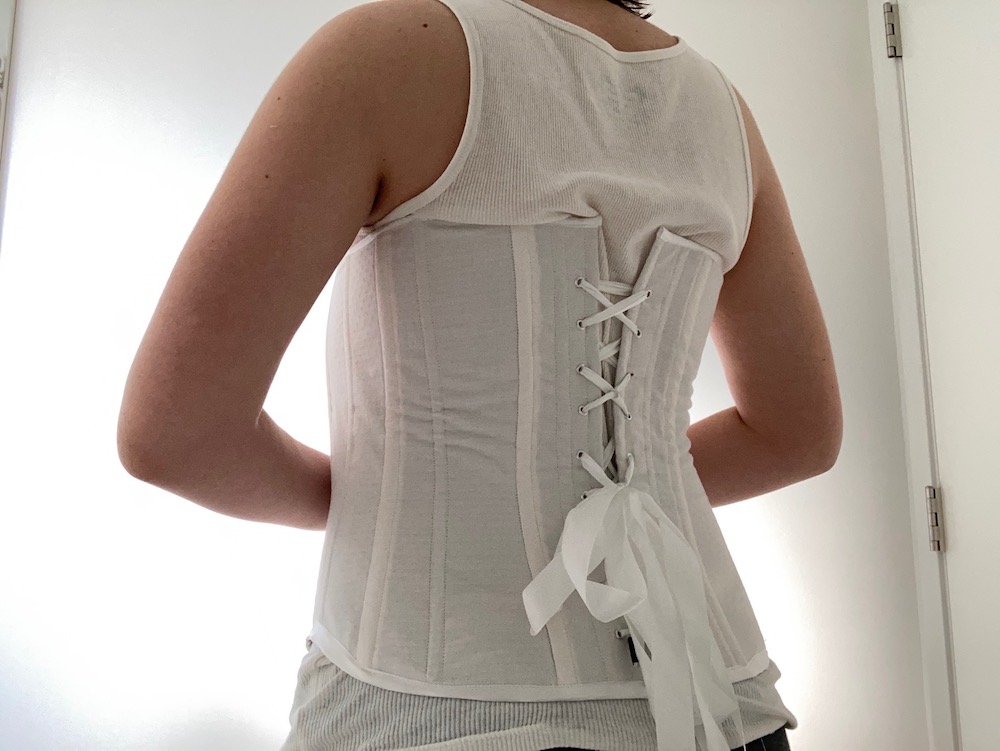
So these are photos of the finished corset! There are some comments I have about it that I'll go over now:
1. The canvas material is sturdy and holds up well, but I wish I'd used a stiffer fabric for the outer corset layer because the fabric I chose wrinkles too easily
2. I wish I had used two-piece eyelets because the one-piece eyelets just aren't as heavy-duty.
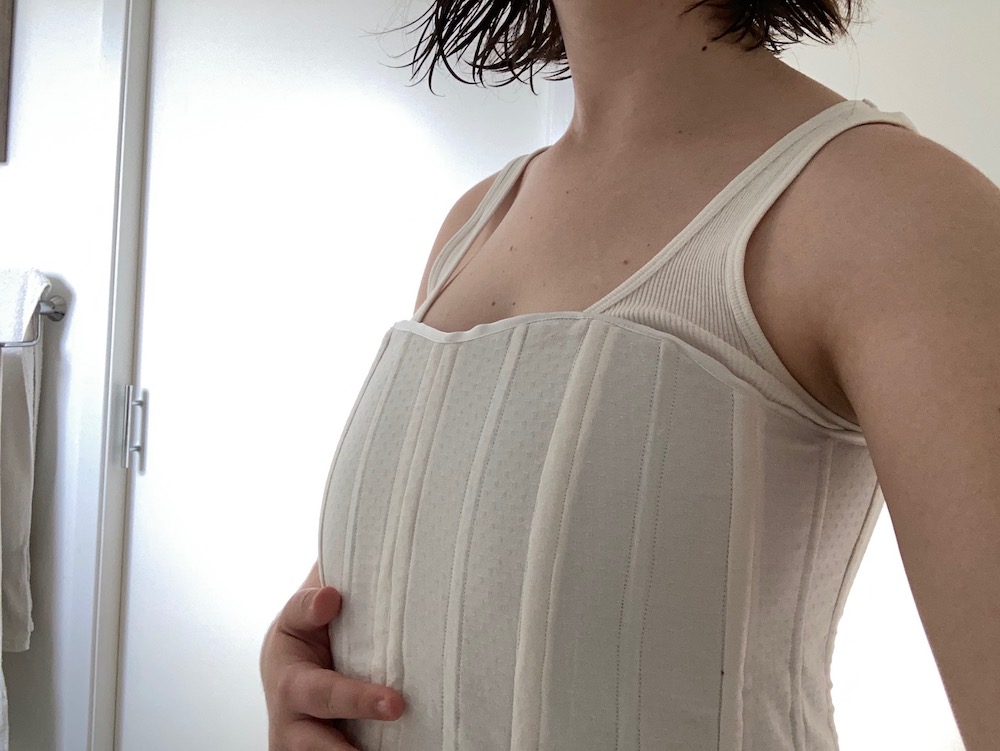
3. The overall size and shape is pretty good and I don't have any trouble breathing (I wore it while biking all day and I was fine). However, the bottom edge is a tad too big and doesn't sit flush to the skin. I would also like to redo the shape of the corset around the bust into something more flattering.
I've been wearing the corset over a wife-beater for a few days now and it's pretty dang comfy. There is some awkward wiggling in and out of the corset because I forewent the busk, and it's a little tricking tightening the corset by myself. Both those problems are manageable though and aren't that big of an issue. The corset can be somewhat visible, but it really depends on the top I'm wearing, and it would've probably been more visible if I had included the busk. A bigger issue is wearing it with something tight-fitting, like jeans. The bottom edge of the corset is awkward to wear under jeans, and I'll probably shorten the corset if I ever make another one. The corset doesn't completely correct my posture (I still have to work on keeping my shoulders back), but I definitely think it prevents me from the extreme sort of slouching that I used to do. I have noticed some back pain since I started wearing the corset and I don't really know what that's about, but it just might be because my body's so used to having horrible posture that good posture hurts. I really don't know. All of these cons however are nothing compared to the pro that I no longer have to pull up my bra straps every five minutes!! That single benefit makes me willing to look past anything.
So, I've decided I'm not going to wear this thing everyday, but it was a cool experiment. Like I mentioned before, the pattern I used was for a Victorian-era corset. Because I'm a modern woman with modern clothes, it isn't really practical. The biggest issue was the length: not really fun to wear with pants or shorts! However, I think it would be cool to alter the pattern into a more modern garment -- aka bring the top edge down and shorten the bottom so it doesn't go past the bellybutton. I think with adjustments this corset could be a practical clothing choice, but that will have to be a project for another time (when I feel up to sewing again). If nothing else, this corset was good practice, and I learned a lot about sewing in the process.